
Frequency
Type of code
- Fixed. The code emitted by the remote control, is always the same. There is no encryption and once the remote control is duplicated, the copy works directly in the receiver.
- Rolling. The code emitted by the remote control, changes with each pulse. A copy of the remote control should be made, that way generating the same brand and model but with a different serial number, that will be necessary for registry in the receiver. There are specific instructions for each receiver of either how to register the copy, remotely or directly manipulating the receiver.
Buttons
Auto-Programmable The remote control can be registered in the receiver without the need of the original remote control, as long as radio communication is activated and the memory is not full.
PROCESS:
- In front of the receiver keep the JMA remote control pressed during 10 seconds until the red LED goes off (after 4 seconds) and it turns to green (at 10 seconds).
- Once the LED is green, release the button and wait for the LED to definitely go off. During the process, the green LED will flash once or several times depending on the code type until finally going off.
If the process does not work, test the standard method using the original remote control or gaining access directly from the receiver.
Copy
No copy
SEAV® TX Remote
- F 433,92
- C FIX CODE
- B 1,2,3,4,6
- AP NO
- M-BT Biometric / BT Slim / M-FR1 / LITE / M-NOVA PRO / M-BT Advance / SR-4V / SR-48
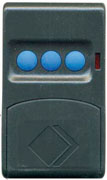
SOMMER® 4004 Remote
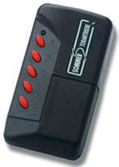
ROSSI® CT Remote
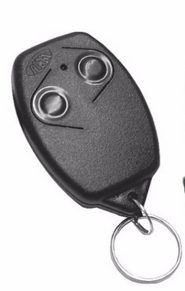
HOW TO SYNCHRONISE ROSSI ROLLING CODE REMOTE CONTROLS
ROSSI remote control synchronisation can only be performed directly on the receiver itself.
Synchronising the remote control directly on the receiver
1. Hold the button on the receiver. The red LED will remain lit.
2. Hold down the desired button on the JMA remote control until the LED light on the receiver goes out.
3. Release the button on the JMA remote control. The remote control has been synchronised.
4. Repeat the process for the other buttons.
SPACE® SP Remote
- F 433,92MHz
- C ROLLING CODE
- B 2,4
- AP YES
- M-NOVA PRO / BT Slim / M-BT Biometric / M-BT Advance
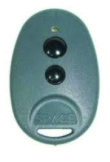
FORSA® GO Remote
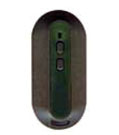
SYNCHRONISING GO ROLLING CODE REMOTE CONTROLS
The GO remote control is synchronised directly with the receiver the first time the button is pressed. However, this option is disabled on some models, which must be synchronised manually.
GO remote control manual synchronisation procedure
1. Open the receiver and locate a switch or pushbutton labelled \"PROG\".
2. Press the button or turn on the switch.
3. Within ten (10) seconds of the beep, press the button on the device to be synchronised.
The receiver will emit another short beep to indicate that the remote control has been synchronised.
If the receiver fails to synchronise the device (does not emit the short beep) it may mean that the memory is full and the remote control cannot be synchronised without the installer\'s permission.
4. After 10 seconds the receiver will exit synchronisation mode and emit 2 short beeps.
Observations
If the procedure fails, it may mean that the receiver memory is full and impedes synchronisation of new devices without the installer\'s permission.
BFT® TEO Remote
- F 433,92
- C FIX CODE
- B 1,2,3,4
- AP NO
- M-BT Biometric / BT Slim / M-FR1 / LITE / M-NOVA PRO / M-BT Advance / SR-4V / SR-48
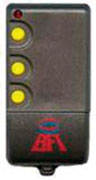
TORMATIC® MNHS Remote
- F 433,92
- C ROLLING CODE
- B 2,4
- AP NO
- M-BT Biometric / BT Slim / M-FR1 / M-NOVA PRO / M-BT Advance
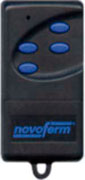
SYNCHRONISING NOVOFERM ROLLING CODE REMOTE CONTROLS
The Novoferm remote control can only be synchronised directly on the receiver.
Direct synchronisation procedure on the receiver
1. Open the receiver and press the button located inside until the LED begins to flash.
2. Then press the button on the remote control and hold for approximately 3 seconds until the LED begins to flash quickly.
Take the following steps if the facility has a ceiling-mounted motor.
ROPER® GO Remote
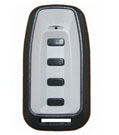
SYNCHRONISING GO ROLLING CODE REMOTE CONTROLS
The GO remote control is synchronised directly with the receiver the first time the button is pressed. However, this option is disabled on some models, which must be synchronised manually.
GO remote control manual synchronisation procedure
1. Open the receiver and locate a switch or pushbutton labelled \"PROG\".
2. Press the button or turn on the switch.
3. Within ten (10) seconds of the beep, press the button on the device to be synchronised.
The receiver will emit another short beep to indicate that the remote control has been synchronised.
If the receiver fails to synchronise the device (does not emit the short beep) it may mean that the memory is full and the remote control cannot be synchronised without the installer\'s permission.
4. After 10 seconds the receiver will exit synchronisation mode and emit 2 short beeps.
Observations
If the procedure fails, it may mean that the receiver memory is full and impedes synchronisation of new devices without the installer\'s permission.
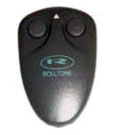
ROLLTORE® MPSTPE Remote
- F 433,92
- C ROLLING CODE
- B 2
- AP YES
- M-BT Biometric / BT Slim / M-FR1 / M-NOVA PRO / M-BT Advance
SYNCHRONISING PRASTEL ROLLING CODE REMOTE CONTROL
PRASTEL remote controls can be synchronised either directly on the receiver or remotely using a remote control already synchronised with the receiver.
Remote synchronisation procedure
1. Stand near the receiver (1-2 metres) with the synchronised device.
2. Press and release buttons 1 and 2 simultaneously.
3. The LED on the remote control will light up after two seconds and turn off.
4. When the LED on the remote control lights up again, simultaneously press buttons 1 and 2 and hold until the LED begins to flash.
5. When the LED stops flashing the remote control will activate the synchronisation mode of the receiver.
6. The receiver will remain in synchronisation mode for around 10 seconds.
7. Press one of the buttons on the remote control to be synchronised.
8. The receiver will save the code.
Direct synchronisation procedure on the receiver
1. Connect the receiver to the power supply.
2. Press the ENTER RADIO button. All the red LEDS will light up for 2 seconds, after which only the first LED will remain lit.
3. Press the \"SET\" button repeatedly to select the relay you wish to associate with the transmission.
4. Press the desired button to transmit the code. Each button (channel) transmits a different code.
a. The LED flashes slowly during synchronisation and remains steady once the operation has been successfully concluded.
b. If a LED begins to flash quickly, it means that this channel has already been synchronised and associated with the LED concerned. Repeat the operation to change allocation of the relay prior to the one currently selected.
c. If all the LEDS flash at once it means that the memory is full. The code has not been stored.
5. Repeat the operation for all buttons (channels) you wish to synchronise, always selecting the relay to which they are to be associated.
6. Repeat the operation for all the remote controls you wish to synchronise.
7. Press ENTER RADIO again to exit synchronisation mode. The LEDS will turn off. The device will exit synchronisation mode automatically 10 seconds after the last operation.
8. The codes are stored and will not be deleted even in the event of a power cut.
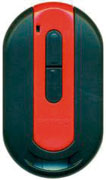
ROPER® MINI GO Remote
SYNCHRONISING GO ROLLING CODE REMOTE CONTROLS
The GO remote control is synchronised directly with the receiver the first time the button is pressed. However, this option is disabled on some models, which must be synchronised manually.
GO remote control manual synchronisation procedure
1. Open the receiver and locate a switch or pushbutton labelled \"PROG\".
2. Press the button or turn on the switch.
3. Within ten (10) seconds of the beep, press the button on the device to be synchronised.
The receiver will emit another short beep to indicate that the remote control has been synchronised.
If the receiver fails to synchronise the device (does not emit the short beep) it may mean that the memory is full and the remote control cannot be synchronised without the installer\'s permission.
4. After 10 seconds the receiver will exit synchronisation mode and emit 2 short beeps.
Observations
If the procedure fails, it may mean that the receiver memory is full and impedes synchronisation of new devices without the installer\'s permission.
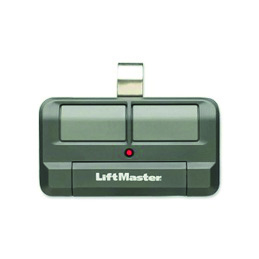
CHAMBERLAIN 2.0® 892MAX Remote
SYNCHRONISING LIFT MASTER ROLLING CODE REMOTE CONTROLS
The Lift Master remote control can only be synchronised directly on the receiver.
Direct synchronisation procedure on the receiver
1. Press the button on the remote control and hold.
2. Press and release the Learn button for channel A on the receiver.
3. The control LED will flash once.
4. Release the remote control button.
If you release the remote control button before the control LED flashes the receiver will not accept the code.
Repeat this procedure for any other devices you wish to add.
If you are using a second door, select another button on the remote control and repeat the steps for channel B.
The selected remotes can not be copied with a single JMA remote