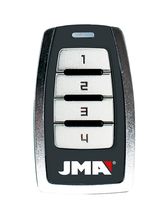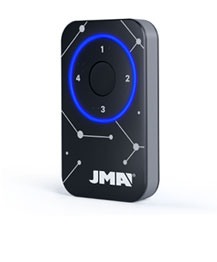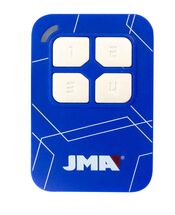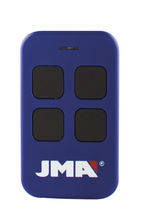
Legend: Click on the symbols for further information

Frequency

Type of code

  1. Fixed. The code emitted by the remote control, is always the same. There is no encryption and once the remote control is duplicated, the copy works directly in the receiver.
  2. Rolling. The code emitted by the remote control, changes with each pulse. A copy of the remote control should be made, that way generating the same brand and model but with a different serial number, that will be necessary for registry in the receiver. There are specific instructions for each receiver of either how to register the copy, remotely or directly manipulating the receiver.

Buttons

Auto-Programmable The remote control can be registered in the receiver without the need of the original remote control, as long as radio communication is activated and the memory is not full.

PROCESS:

  1. In front of the receiver keep the JMA remote control pressed during 10 seconds until the red LED goes off (after 4 seconds) and it turns to green (at 10 seconds).
  2. Once the LED is green, release the button and wait for the LED to definitely go off. During the process, the green LED will flash once or several times depending on the code type until finally going off.

If the process does not work, test the standard method using the original remote control or gaining access directly from the receiver.

Copy

No copy

KEY® TXB-42R Remote

Remove Remote
  • F 433,92
  • C ROLLING CODE
  • B 2
  • AP NO
  • M-BT Biometric / BT Slim / M-FR1 / M-NOVA PRO / M-BT Advance
KEY® TXB-42R

Synchronising intructions

Print

SYNCHRONISING KEY ROLLING CODE REMOTE CONTROLS

KEY remote controls can only be synchronised directly on the receiver.

Direct synchronisation procedure on the receiver (type A receiver)

1. Press button S on the receiver.

2. The LED (Ir1) will light up.

3. Release button S and press button P.

4. The LED (Ir1) will flash once.

5. Release the button.

6. Press the button of the remote control to be synchronised until the LED (Ir1) begins to flash, then release.

7. Wait for 10 seconds for the receiver to exit synchronisation mode.

Direct synchronisation procedure on the receiver (type B receiver)

1. Press KEY the same number of times as the channel you wish to synchronise (one time for channel 1, two times for channel 2, etc.).

2. The LED will flash the number of times equal to the number of the selected channel.

3. Within the next 7 seconds, press the button on the remote control to be synchronised for 2 seconds.4. The LED will flash once if synchronisation has been successful.

5. Repeat step 3 if you wish to add more remote controls.

CARDIN® S27 M Remote

Remove Remote
  • F 27,09
  • C FIX CODE
  • B 1,2
  • AP NO
  • M-Q MAX 1
CARDIN® S27 M

TAU® 250 TX0E Remote

Remove Remote
  • F 433,92
  • C FIX CODE
  • B 2,4
  • AP NO
  • M-BT Biometric / BT Slim / M-FR1 / LITE / M-NOVA PRO / M-BT Advance / SR-4V / SR-48
TAU® 250 TX0E

HORMANN® HS 27015 Remote

Remove Remote
  • F 27,015
  • C FIX CODE
  • B 2,4
  • AP NO
  • M-Q MAX 1
HORMANN® HS 27015

CASALI® JA40 TM433 Remote

Remove Remote
  • F 433,92
  • C FIX CODE
  • B 2,4
  • AP NO
  • M-BT Biometric / BT Slim / M-FR1 / LITE / M-NOVA PRO / M-BT Advance / SR-4V / SR-48
CASALI® JA40 TM433

SEA® HEAD 868 Remote

Remove Remote
  • F 868,3
  • C ROLLING CODE
  • B 2,4
  • AP NO
SEA® HEAD 868

GIBIDI® AU1600 Remote

Remove Remote
  • F 433,92
  • C ROLLING CODE
  • B 2
  • AP YES
  • M-BT Biometric / BT Slim / M-FR1 / M-NOVA PRO / M-BT Advance / SR-4V / SR-48
GIBIDI® AU1600

Synchronising intructions

Print

SYNCHRONISING GIBIDI ROLLING CODE REMOTE CONTROLS

Direct synchronisation procedure on the receiver

1. Open the receiver and locate the programming button on the circuit board.

2. Press it briefly.

The receiver LED will flash.

3. Within 10 seconds, press the button of the remote control you wish to synchronise.

The receiver will automatically exit synchronisation mode after a short time.

AVIDSEN® 104250 RED Remote

Remove Remote
  • F 433,92
  • C ROLLING CODE
  • B 4
  • AP NO
  • M-BT Biometric / BT Slim / M-FR1 / M-NOVA PRO / M-BT Advance / SR-4V
AVIDSEN® 104250 RED

Synchronising intructions

Print

SYNCHRONISING V2 ROLLING CODE REMOTE CONTROLS

V2 remote controls can be synchronised either remotely or directly on the receiver.

Remote synchronising procedure

1. Press buttons 1 and 2 on the remote control to be synchronised simultaneously for approximately 10 seconds.

2. Release.

3. Within 5 seconds, press any other button on the device to be synchronised.

4. The receiver LED will turn off after a few seconds, indicating that the unit has exited synchronisation mode.

The code has been stored.

Since this option is not enabled on all models we recommend the following procedure.

Direct synchronisation procedure on the receiver

1. Open the receiver and locate the small SW1 button.

2. Press until the receiver LED lights up.

3. Within 5 seconds, press the button on the remote control to be synchronised and hold until the receiver LED blinks.

4. The receiver LED will turn off after a few seconds, indicating that the unit has exited synchronisation mode.

The code has been stored.

Observations

If the procedure fails, it may mean that the receiver memory is full and impedes synchronisation of new devices without the installer\'s permission.

OPEN OUT® MTQ NEW Remote

Remove Remote
  • F 26,995
  • C FIX CODE
  • B 2,4
  • AP NO
  • M-Q MAX 1
OPEN OUT® MTQ NEW

BFT® MITTO Remote

Remove Remote
  • F 433,92
  • C ROLLING CODE
  • B 2,4
  • AP YES
  • M-BT Biometric / BT Slim / M-FR1 / M-NOVA PRO / M-BT Advance / SR-4V / SR-48
BFT® MITTO

Synchronising intructions

Print

SYNCHRONISING BFT ROLLING CODE REMOTE CONTROLS

The receivers of these models enable remote or direct synchronisation.

Remote synchronisation procedure for the BFT MITTO remote control

1. Stand near the receiver and press the hidden button at the rear of the BFT original remote control for 2 seconds.

2. Press the left button on the front of the original remote control for 2 seconds.

3. Press the synch button on the rear of the device to be synchronised.

4. Finally, press the first button on the device to be synchronised.

Remote synchronisation procedure for the BFT TRC or MITTO remote control

1. Open the receiver and locate the SW-1 and SW-2 buttons. Press the first (SW-1).

A flashing LED should light up in the receiver.

2. Open the battery cover of the already synchronised remote control or the one you have copied and press the button inside.

The receiver light should change to steady.

3. Press the button of the device to be synchronised.

The light on the receiver will return to flashing and turn off after 30 seconds, indicating that the synchronisation process has finished.

Observations

If the procedure fails, it may mean that the receiver memory is full and impedes synchronisation of new devices without the installer\'s permission.

V2® TCQ-30 Remote

Remove Remote
  • F 30,875
  • C FIX CODE
  • B 1,2,4
  • AP NO
  • M-Q MAX 1
V2® TCQ-30

FADINI® ASTRO 433 Remote

Remove Remote
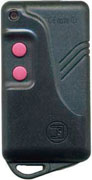
  • F 433,92
  • C FIX CODE
  • B 2,4
  • AP NO
  • M-BT Biometric / BT Slim / M-FR1 / LITE / M-NOVA PRO / M-BT Advance / SR-4V / SR-48
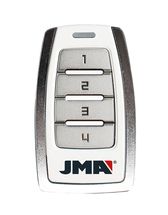
FADINI® ASTRO 433

The selected remotes can not be copied with a single JMA remote