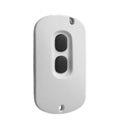
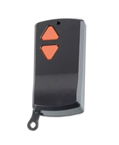
Find your remote
Find your remote and compatible JMA Remote to copy
FOR: ADHER® A-433
- F 433,92
- C FIX CODE
- B 1,2,3
- AP NO
- M-BT Biometric / BT Slim / M-FR1 / LITE / M-NOVA PRO / M-BT Advance / SR-4V / SR-48

FOR: ADHER® CN 1-2
- F 312
- C FIX CODE
- B 2
- AP NO
- M-BT Biometric / BT Slim / M-FR1 / M-NOVA PRO / M-BT Advance / SR-4V

FOR: ADHER® CN-1
- F 312
- C FIX CODE
- B 1
- AP NO
- M-BT Biometric / BT Slim / M-FR1 / M-NOVA PRO / M-BT Advance / SR-4V

FOR: ADYX® 433-HG BRAVO
- F 433,92
- C ROLLING CODE
- B 4
- AP YES
- M-BT Biometric / BT Slim / M-FR1 / M-NOVA PRO / M-BT Advance

SYNCHRONISING GENIUS ROLLING CODE REMOTE CONTROLS
GENIUS remote controls can be synchronised either directly on the receiver or remotely using a remote control already synchronised with the receiver.
Remote synchronising procedure
1. Press and hold buttons P1 and P2 on the remote control already synchronised in the facility for at least 5 seconds.
2. Within 10 seconds, press the same button on the remote control already synchronised in the facility as the one you wish to synchronise.
3. The receiver will enter synchronisation mode and the LED for the active channel will light up steady.
4. Press the button you wish to synchronise on the new remote control.
5. Repeat Step 4 if you wish to add more remote controls.
6. Wait for 10 seconds for the receiver to exit synchronisation mode.
7. Repeat the process for the other channel.
Direct synchronisation procedure on the receiver1. Press the button on the receiver for the channel you wish to synchronise - SW1 to synchronise CH1 and SW2 to synchronise CH2. Either LED 1 or LED 2 will light up steady indicating that the receiver is in synchronisation mode.
2. Within 10 seconds press and hold the button you wish to synchronise on the remote control for at least 1 second.
3. If synchronisation is successful, the LED will flash a couple of times.
4. Repeat the process from Step 2 to synchronise additional remote controls.
5. The receiver will automatically exit synchronisation mode 10 seconds after the last synchronisation.
FOR: ADYX® TM-433
- F 433,92
- C FIX CODE
- B 1,2,3
- AP NO
- M-BT Biometric / BT Slim / M-FR1 / LITE / M-NOVA PRO / M-BT Advance / SR-4V / SR-48

FOR: AERF® BT
- F 433,92
- C FIX CODE
- B 1,2
- AP NO
- M-BT Biometric / BT Slim / M-FR1 / LITE / M-NOVA PRO / M-BT Advance / SR-4V / SR-48


