Frequency
Type of code
- Fixed. The code emitted by the remote control, is always the same. There is no encryption and once the remote control is duplicated, the copy works directly in the receiver.
- Rolling. The code emitted by the remote control, changes with each pulse. A copy of the remote control should be made, that way generating the same brand and model but with a different serial number, that will be necessary for registry in the receiver. There are specific instructions for each receiver of either how to register the copy, remotely or directly manipulating the receiver.
Buttons
Auto-Programmable The remote control can be registered in the receiver without the need of the original remote control, as long as radio communication is activated and the memory is not full.
PROCESS:
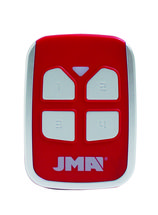
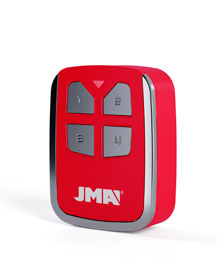
- In front of the receiver keep the JMA remote control pressed during 10 seconds until the red LED goes off (after 4 seconds) and it turns to green (at 10 seconds).
- Once the LED is green, release the button and wait for the LED to definitely go off. During the process, the green LED will flash once or several times depending on the code type until finally going off.
If the process does not work, test the standard method using the original remote control or gaining access directly from the receiver.
Copy
No copy
PROEM® ERC4F/S Remote
APRIMATIC® TX-E Remote
- F 433,92
- C ROLLING CODE
- B 2,4
- AP YES
- M-BT Biometric / BT Slim / M-FR1 / M-NOVA PRO / M-BT Advance / SR-4V / SR-48

SYNCHRONISING APRIMATIC TXM ROLLING CODE REMOTE CONTROLS
Remote synchronisation procedure for the APRIMATIC TXM remote control
1. Stand near the receiver and press all the emission keys of the device already synchronised in the facility.
The receiver will emit a beep and the LED will flash.
2. Press the synch button of the duplicated device.
The beep will pause and the LED will remain steady for a moment to confirm that it has received the valid code.
3. Wait 30 seconds to exit the synchronisation mode or press the synch or copy button of the original or duplicated remote control.
The LED and buzzer will turn off.
Direct synchronisation procedure for the APRIMATIC TXM remote control
1. Open the receiver and press the small button located near the LED for 2 seconds.
The receiver LED will flash
2. Press the synch button of the duplicated device.
The beep will pause and the LED will remain steady for a moment to confirm that it has received the valid code.
3. Wait 30 seconds to exit the synchronisation mode or press the synch or copy button of the master remote control.
The LED and buzzer will turn off.
Observations
If the procedure fails, it may mean that the receiver memory is full and impedes synchronisation of new devices without the installer\'s permission.
SIMINOR® CVS Remote
AERF® TMP-1 Remote
- F 433,92
- C ROLLING CODE
- B 3
- AP YES
- M-BT Biometric / BT Slim / M-FR1 / M-NOVA PRO / M-BT Advance / SR-4V / SR-48

SYNCHRONISING AERF ROLLING CODE REMOTE CONTROLS
The JCM rolling code remote control synchronisation procedure is identical for all models, including customised models, except the 868 MHz.
There are two synchronisation procedures for these devices.
Remote synchronisation procedure using the original remote control
1. Stand near the receiver and use a pointed object to press the pushbutton at the rear of the remote control already synchronised in the facility. If there is no rear button, press all the buttons on the original device at once.
The receiver will emit a beep, indicating that it has switched to synchronisation mode.
2. Within 10 seconds of the beep, press the button on the device to be synchronised.
The receiver will emit another short beep to indicate that the remote control has been synchronised.
If the receiver fails to synchronise the device (does not emit the short beep) it may mean that the memory is full and the remote control cannot be synchronised without the installer\'s permission.
3. After 10 seconds the receiver will exit synchronisation mode and emit 2 short beeps.
ET SYSTEM® BLUE Remote
- F 433,92
- C ROLLING CODE
- B 2,4,6
- AP NO
- M-BT Biometric / BT Slim / M-NOVA PRO / M-BT Advance
HOW TO SYNCHRONISE ET BLUE AND ET BLUE MIX ROLLING CODE REMOTE CONTROLS
ET BLUE and ET BLUE MIX remote control synchronisation can only be performed directly on the receiver itself.
Synchronising the remote control directly on the receiver
1. Press SET until “Pr9” appears on the display.
2. Browse the menu with the UP and DOWN buttons until “Lrn” appears on the display.
3. Press SET until “ch1” appears on the display.
4. Press the button on the remote control to be synchronised.
5. After being programmed, “dnE” will appear on the display.
6. To record more channels, press UP and DOWN until “ch2” or “ch3” appears on the display and press the button on the remote control to be synchronised.
7. To finish, press SET until “End” appears on the display.
O&O® T.COM R8 Remote
VDS® TX 02 Remote
- F 433,92
- C ROLLING CODE
- B 4
- AP YES
- M-BT Biometric / BT Slim / M-FR1 / M-NOVA PRO / M-BT Advance / SR-4V / SR-48

SYNCHRONISING V2 ROLLING CODE REMOTE CONTROLS
V2 remote controls can be synchronised either remotely or directly on the receiver.
Remote synchronising procedure
1. Press buttons 1 and 2 on the remote control to be synchronised simultaneously for approximately 10 seconds.
2. Release.
3. Within 5 seconds, press any other button on the device to be synchronised.
4. The receiver LED will turn off after a few seconds, indicating that the unit has exited synchronisation mode.
The code has been stored.
Since this option is not enabled on all models we recommend the following procedure.
Direct synchronisation procedure on the receiver
1. Open the receiver and locate the small SW1 button.
2. Press until the receiver LED lights up.
3. Within 5 seconds, press the button on the remote control to be synchronised and hold until the receiver LED blinks.
4. The receiver LED will turn off after a few seconds, indicating that the unit has exited synchronisation mode.
The code has been stored.
Observations
If the procedure fails, it may mean that the receiver memory is full and impedes synchronisation of new devices without the installer\'s permission.
KING GATES® STYLO 4K Remote
HOW TO SYNCHRONISE KING GATES STYLO ROLLING CODE REMOTE CONTROLS
Direct synchronisation procedure on the receiver:
1. Open the receiver and locate the programming button on the circuit board.
2. Hold the button for two seconds.
The receiver LED will switch on.
3. Press the button of the remote control you wish to synchronise within 10 seconds.
The receiver will automatically exit synchronisation mode after a short time.
O&O® T.COM R4 Remote
SYNCHRONISING JCM ROLLING CODE REMOTE CONTROLS
The JCM rolling code remote control synchronisation procedure is identical for all models except the 868 MHz.
There are 3 synchronisation procedures for these devices.
PIN-MODE remote synchronising procedure
The following procedure must be applied if the receiver bears the words PIN-MODE:
1. Stand near the receiver and use a pointed object to press the pushbutton at the rear of the remote control to be synchronised.
The receiver will emit a long beep, indicating that the device has been successfully synchronised.
Remote synchronisation procedure using the original remote control
1. Stand near the receiver and use a pointed object to press the pushbutton at the rear of the synchronised remote control.
The receiver will emit a beep, indicating that it has switched to synchronisation mode.
2. Within 10 seconds of the beep, press the button on the device to be synchronised.
The receiver will emit another short beep to indicate that the remote control has been synchronised.
If the receiver fails to synchronise the device (does not emit the short beep) it may mean that the memory is full and the remote control cannot be synchronised without the installer's permission.
3. After 10 seconds the receiver will exit synchronisation mode and emit 2 short beeps.
Direct synchronisation procedure on the receiver
1. Open the receiver and locate a switch or pushbutton labelled "PROG".
2. Press the button or turn on the switch.
The receiver will emit a long beep and the LED will light up. From this point, follow the previous procedure from step 2 above.
SEAV® HAPPY S Remote
- F 433,92
- C FIX CODE
- B 1,2,3
- AP NO
- M-BT Biometric / BT Slim / M-FR1 / LITE / M-NOVA PRO / M-BT Advance / SR-4V / SR-48

OPEN OUT® MTQ NEW Remote
NOVOFERM® NOVOTRON Remote
- F 433,92
- C ROLLING CODE
- B 2,4
- AP NO
- M-BT Biometric / BT Slim / M-FR1 / M-NOVA PRO / M-BT Advance

SYNCHRONISING NOVOFERM ROLLING CODE REMOTE CONTROLS
The Novoferm remote control can only be synchronised directly on the receiver.
Direct synchronisation procedure on the receiver
1. Open the receiver and press the button located inside until the LED begins to flash.
2. Then press the button on the remote control and hold for approximately 3 seconds until the LED begins to flash quickly.
Take the following steps if the facility has a ceiling-mounted motor.
CLEMSA® DIGICODE MH Remote
- F 433,92
- C FIX CODE
- B 1,2,3
- AP NO
- M-BT Biometric / BT Slim / M-FR1 / LITE / M-NOVA PRO / M-BT Advance / SR-4V / SR-48

PUJOL® VARIO MARS Remote
- F 433,92
- C ROLLING CODE
- B 1,2,3
- AP YES
- M-BT Biometric / BT Slim / M-FR1 / M-NOVA PRO / M-BT Advance / SR-4V / SR-48

SYNCHRONISING THE PUJOL VARIO ROLLING CODE REMOTE CONTROLS
PUJOL VARIO rolling code remote controls are synchronised using the same procedure as for JMC devices.
There are 3 synchronisation procedures for these devices.
PIN-MODE remote synchronising procedure
The following procedure must be applied if the receiver bears the words PIN-MODE:
1. Stand near the receiver and use a pointed object to press the pushbutton at the rear of the remote control you wish to synchronise.
The receiver will emit a long beep, indicating that the device has been successfully synchronised.
Remote synchronisation procedure using the original remote control
1. Stand near the receiver and use a pointed object to press the pushbutton at the rear of the synchronised remote control.
The receiver will emit a beep, indicating that it has switched to synchronisation mode.
2. Within 10 seconds of the beep, press the button on the device to be synchronised.
The receiver will emit another short beep to indicate that the remote control has been synchronised.
If the receiver fails to synchronise the device (does not emit the beep) it may mean that the memory is full and the remote control cannot be synchronised without the installer\'s permission.
3. After 10 seconds the receiver will exit synchronisation mode and emit 2 short beeps.
Direct synchronisation procedure on the receiver
1. Open the receiver and locate a switch or pushbutton labelled \"PROG\".
2. Press the button or turn on the switch.
The receiver will emit a beep and the LED will light up. From this point, follow the previous procedure from step 2 above.
KING GATES® STYLO 4 Remote
- F 433,92
- C ROLLING CODE
- B 2,4
- AP NO
- M-BT Biometric / BT Slim / M-FR1 / M-NOVA PRO / M-BT Advance

HOW TO SYNCHRONISE KING GATES STYLO ROLLING CODE REMOTE CONTROLS
Direct synchronisation procedure on the receiver:
1. Open the receiver and locate the programming button on the circuit board.
2. Hold the button for two seconds.
The receiver LED will switch on.
3. Press the button of the remote control you wish to synchronise within 10 seconds.
The receiver will automatically exit synchronisation mode after a short time.
SOMFY® K-EASY Remote
PUJOL® VARIO Remote
- F 433,92
- C ROLLING CODE
- B 1,2,3
- AP YES
- M-BT Biometric / BT Slim / M-FR1 / M-NOVA PRO / M-BT Advance / SR-4V / SR-48

SYNCHRONISING THE PUJOL VARIO ROLLING CODE REMOTE CONTROLS
PUJOL VARIO rolling code remote controls are synchronised using the same procedure as for JMC devices.
There are 3 synchronisation procedures for these devices.
PIN-MODE remote synchronising procedure
The following procedure must be applied if the receiver bears the words PIN-MODE:
1. Stand near the receiver and use a pointed object to press the pushbutton at the rear of the remote control you wish to synchronise.
The receiver will emit a long beep, indicating that the device has been successfully synchronised.
Remote synchronisation procedure using the original remote control
1. Stand near the receiver and use a pointed object to press the pushbutton at the rear of the synchronised remote control.
The receiver will emit a beep, indicating that it has switched to synchronisation mode.
2. Within 10 seconds of the beep, press the button on the device to be synchronised.
The receiver will emit another short beep to indicate that the remote control has been synchronised.
If the receiver fails to synchronise the device (does not emit the beep) it may mean that the memory is full and the remote control cannot be synchronised without the installer\'s permission.
3. After 10 seconds the receiver will exit synchronisation mode and emit 2 short beeps.
Direct synchronisation procedure on the receiver
1. Open the receiver and locate a switch or pushbutton labelled \"PROG\".
2. Press the button or turn on the switch.
The receiver will emit a beep and the LED will light up. From this point, follow the previous procedure from step 2 above.
GENIUS® A25NEW Remote
SYNCHRONISING GENIUS ROLLING CODE REMOTE CONTROLS
GENIUS remote controls can be synchronised either directly on the receiver or remotely using a remote control already synchronised with the receiver.
Remote synchronising procedure
1. Press and hold buttons P1 and P2 on the remote control already synchronised in the facility for at least 5 seconds.
2. Within 10 seconds, press the same button on the remote control already synchronised in the facility as the one you wish to synchronise.
3. The receiver will enter synchronisation mode and the LED for the active channel will light up steady.
4. Press the button you wish to synchronise on the new remote control.
5. Repeat Step 4 if you wish to add more remote controls.
6. Wait for 10 seconds for the receiver to exit synchronisation mode.
7. Repeat the process for the other channel.
Direct synchronisation procedure on the receiver
1. Press the button on the receiver for the channel you wish to synchronise - SW1 to synchronise CH1 and SW2 to synchronise CH2. Either LED 1 or LED 2 will light up steady indicating that the receiver is in synchronisation mode.
2. Within 10 seconds press and hold the button you wish to synchronise on the remote control for at least 1 second.
3. If synchronisation is successful, the LED will flash a couple of times.
4. Repeat the process from Step 2 to synchronise additional remote controls.
5. The receiver will automatically exit synchronisation mode 10 seconds after the last synchronisation.
SOMFY® K-EASY NEW Remote
PUJOL® TWIN Remote
- F 433,92
- C ROLLING CODE
- B 2
- AP YES
- M-BT Biometric / BT Slim / M-FR1 / M-NOVA PRO / M-BT Advance / SR-4V / SR-48

SYNCHRONISING JCM ROLLING CODE REMOTE CONTROLS
The JCM rolling code remote control synchronisation procedure is identical for all models except the 868 MHz.
There are 3 synchronisation procedures for these devices.
PIN-MODE remote synchronising procedure
The following procedure must be applied if the receiver bears the words PIN-MODE:
1. Stand near the receiver and use a pointed object to press the pushbutton at the rear of the remote control to be synchronised.
The receiver will emit a long beep, indicating that the device has been successfully synchronised.
Remote synchronisation procedure using the original remote control
1. Stand near the receiver and use a pointed object to press the pushbutton at the rear of the synchronised remote control.
The receiver will emit a beep, indicating that it has switched to synchronisation mode.
2. Within 10 seconds of the beep, press the button on the device to be synchronised.
The receiver will emit another short beep to indicate that the remote control has been synchronised.
If the receiver fails to synchronise the device (does not emit the short beep) it may mean that the memory is full and the remote control cannot be synchronised without the installer\'s permission.
3. After 10 seconds the receiver will exit synchronisation mode and emit 2 short beeps.
Direct synchronisation procedure on the receiver
1. Open the receiver and locate a switch or pushbutton labelled \"PROG\".
2. Press the button or turn on the switch.
The receiver will emit a long beep and the LED will light up. From this point, follow the previous procedure from step 2 above.
OPEN OUT® GIBIDI 26,995 Remote
OPEN OUT® AU1680 Remote
- F 433,92
- C ROLLING CODE
- B 2,4
- AP YES
- M-BT Biometric / BT Slim / M-FR1 / M-NOVA PRO / M-BT Advance / SR-4V / SR-48

SYNCHRONISING GIBIDI ROLLING CODE REMOTE CONTROLS
Direct synchronisation procedure on the receiver
1. Open the receiver and locate the programming button on the circuit board.
2. Press it briefly.
The receiver LED will flash.
3. Within 10 seconds, press the button of the remote control you wish to synchronise.
The receiver will automatically exit synchronisation mode after a short time.
SOMFY® KEYTIS RTS NS Remote
- F 433,92
- C ROLLING CODE
- B 2,4
- AP NO
- M-BT Biometric / BT Slim / M-FR1 / M-NOVA PRO / M-BT Advance

SYNCHRONISING SOMFY ROLLING CODE REMOTE CONTROLS
SOMFY remote control can only be synchronised directly on the external receiver and remotely on the integrated shutter receiver. A distinction must be made between SOMFY and TELIS remote controls.
Synchronisation procedure on the receiver
External receiver
1. Press and hold the \"Prog\" button on the receiver for 2 seconds. The red LED on the receiver will remain lit.
Internal receiver (Telis)
1. Press and hold the up and down buttons on the Telis remote control for 2 seconds. The red LED on the receiver will remain lit.
Keytis remote control
2. Press the button of the device to be synchronised. The LED on the receiver will flash.
3. Wait until the LED turns off.
Telis 1RTS remote control
2. Press the rear button on the remote control for half a second. The LED on the receiver will flash.
3. Wait until the LED turns off.
Telis 4 RTS remote control
2. Press the channel selection button until the LED for the desired channel lights up.
3. Press the rear button on the remote control for half a second. The LED on the receiver will flash.
4. Wait until the LED turns off.
GENIUS® JA40 Remote
- F 433,92
- C FIX CODE
- B 1,2,3
- AP NO
- M-BT Biometric / BT Slim / M-FR1 / LITE / M-NOVA PRO / M-BT Advance / SR-4V / SR-48

NOVOFERM® MCHS Remote
- F 433,92
- C ROLLING CODE
- B 2
- AP NO
- M-BT Biometric / BT Slim / M-FR1 / M-NOVA PRO / M-BT Advance

SYNCHRONISING NOVOFERM ROLLING CODE REMOTE CONTROLS
The Novoferm remote control can only be synchronised directly on the receiver.
Direct synchronisation procedure on the receiver
1. Open the receiver and press the button located inside until the LED begins to flash.
2. Then press the button on the remote control and hold for approximately 3 seconds until the LED begins to flash quickly.
Take the following steps if the facility has a ceiling-mounted motor.
KING GATES® STYLO Remote
HOW TO SYNCHRONISE KING GATES STYLO ROLLING CODE REMOTE CONTROLS
Direct synchronisation procedure on the receiver:
1. Open the receiver and locate the programming button on the circuit board.
2. Hold the button for two seconds.
The receiver LED will switch on.
3. Press the button of the remote control you wish to synchronise within 10 seconds.
The receiver will automatically exit synchronisation mode after a short time.
SEAV® BE GOOD Remote
- F 433,92
- C ROLLING CODE
- B 1,2,3
- AP NO
- M-BT Biometric / BT Slim / M-FR1 / M-NOVA PRO / M-BT Advance / SR-4V / SR-48

SYNCHRONISING SEAV ROLLING CODE REMOTE CONTROLS
Remote synchronisation procedure for the SEAV remote control
1. Stand near the receiver and press the first desired channel on the already synchronised remote control for 15 seconds.
The receiver LED will begin to flash while it is waiting for transmission of a code.
2. Press the button for the same channel on the remote control to be synchronised.
The receiver LED will light up steady, indicating that the channel has been synchronised.
Repeat the operation for the remaining buttons.
Direct synchronisation procedure for the SEAV remote control
1. Open the receiver and press the button marked SEL.
The CODE CH1 LED will begin to flash while it is waiting for transmission of a code.
2. Press the button for the same channel on the remote control to be synchronised.
The receiver LED will light up steady, indicating that the channel has been synchronised.
Repeat the same process for the second channel but pressing the SEL button twice (the CODE CH2 LED will flash) and pressing the second button on the duplicated device.
Observations
If the procedure fails, it may mean that the receiver memory is full and impedes synchronisation of new devices without the installer\'s permission.
NOVOFERM® MS41 Remote
The selected remotes can not be copied with a single JMA remote