Leyenda: Clicka sobre la imagen para conocer la definición

Frecuencia

Tipo de código

  1. Fijo. El código emitido por el mando es siempre el mismo. No existe ninguna encriptación y una vez duplicado el mando copia funciona directamente en el receptor.
  2. El código emitido por el mando cambia con cada pulsación. Se debe realizar la copia del mando, generando así un mando de misma marca y modelo pero con número de serie distinto, que será necesario dar de alta en el receptor. Existen instrucciones concretas para cada receptor de cómo dar de alta la copia, ya sea a distancia o directamente manipulando el receptor.

Botones

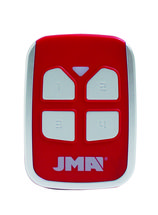
Auto-Programable. El mando puede darse de alta en el receptor sin necesidad del mando original, siempre que el vía radio esté habilitado y la memoria no esté llena.

PROCESO:

  1. Delante del receptor mantener pulsado el mando JMA durante 10 segundos hasta que el led rojo se apague (a los 4 segundos) y vuelva a pasar a verde (a los 10 segundos).
  2. Una vez que el led se encienda en verde, soltar el botón y esperar a que el led se apague definitivamente. Durante el proceso el led verde se encenderá y apagará una o varias veces dependiendo el tipo de código hasta apagarse definitivamente.

 Si el proceso no funciona, probar el método estándar utilizando el mando original o accediendo directamente al receptor

Copy

No copy

Mando ET SYSTEM® MIX

Borrar mando
  • F 433,92
  • C ROLLING CODE
  • B 2,4
  • AP NO
  • M-BT Biometric / BT Slim / M-NOVA PRO / M-BT Advance
ET SYSTEM® MIX

Instrucciones de alta

Imprimir

DAR DE ALTA MANDOS EVOLUTIVOS ET BLUE Y ET BLUE MIX

Los mandos ET BLUE y ET BLUE MIX se deben memorizar de forma directa en el receptor.

Procedimiento de alta directa en el receptor

1. Pulsar SET hasta que aparezca “Pr9” en el display

2. Navegar por el menú con UP o DOWN hasta que aparezca “Lrn” en el display

3. Pulsar SET hasta que aparezca “ch1” en el display

4. Pulsar el mando a memorizar

5. Al ser programado aparecerá “dnE” en el display.

6. Para grabar más canales pulsar UP o DOWN hasta que aparezca “ch2” o “ch3” en el display y entonces pulsar el mando a memorizar

7. Para finalizar, pulsar el botón SET hasta que aparezca “End” en el display.

Mando SOMMER® 4010

Borrar mando
  • F 868,3
  • C ROLLING CODE
  • B 1
  • AP NO
SOMMER® 4010

Mando ELKA® SKJ

Borrar mando
  • F 433,92
  • C ROLLING CODE
  • B 2
  • AP NO
ELKA® SKJ

Mando CLEMSA® E20

Borrar mando
  • F 288
  • C FIX CODE
  • B 1,2,3
  • AP NO
  • M-BT Biometric / BT Slim / M-FR1 / M-NOVA PRO / M-BT Advance / SR-4V
CLEMSA® E20

Mando SOMFY® KEYGO

Borrar mando
  • F 433,92
  • C ROLLING CODE
  • B 1
  • AP NO
SOMFY® KEYGO

Mando CARDIN® S27 M

Borrar mando
  • F 27,09
  • C FIX CODE
  • B 1,2
  • AP NO
  • M-Q MAX 1
CARDIN® S27 M

Mando FADINI® ASTRO 78M

Borrar mando
  • F 30,875
  • C FIX CODE
  • B 1,2,4
  • AP NO
  • M-Q MAX 1
FADINI® ASTRO 78M

Mando NORMSTAHL® T433

Borrar mando
  • F 433,92
  • C ROLLING CODE
  • B 2,4
  • AP NO
  • M-BT Biometric / BT Slim / M-FR1 / M-NOVA PRO / M-BT Advance
NORMSTAHL® T433

Instrucciones de alta

Imprimir

DAR DE ALTA MANDOS EVOLUTIVOS

CRAWFORD/NORMSTHAL

El alta del mando CRAWFORD/NORMSTHAL se puede memorizar únicamente de forma directa. El procedimiento es el siguiente.

Procedimiento de alta en el receptor

1. Presionar el pulsador \"SET\":

1 vez para respuesta impulsional ( El receptor está activo mientras está pulsado el mando)

2 veces para respuesta biestable. (El receptor está activo hasta volver a pulsar)

3 veces para modo \"ON\"

4 veces para modo \"OFF\"

2. Pulsar el botón de emisor a dar de alta

3. El led parpadeará indicando la memorización del código.

Mando ELKA® SKX

Borrar mando
  • F 433,92
  • C FIX CODE
  • B 1,2,3,4
  • AP NO
  • M-BT Biometric / BT Slim / M-FR1 / LITE / M-NOVA PRO / M-BT Advance / SR-4V / SR-48
ELKA® SKX

Mando SPACE ® SP

Borrar mando
  • F 433,92MHz
  • C ROLLING CODE
  • B 2,4
  • AP YES
  • BT Slim / M-NOVA PRO / M-BT Advance
SPACE ® SP

Instrucciones de alta

Imprimir

You must enter each transmitter button separately. Depending on whether the transmitter / pilot button is to control channel 1 or 2, use the corresponding button on the radio card / control panel / receiver to enter the programming procedure:

1.Press and hold the \\"1\\" button on the radio card / control panel / receiver for 2 seconds (if theprogrammed transmitter / transmitter button is to operate channel 1) or the \\"2\\" button (if the programmable pilot / transmitter button is to operate channel 2). The LED will flash.

2.Within 20 seconds press the button of the transmitter / transmitter to be entered - the LED briefly illuminates with a continuous tone, indicating that the correct pilot / transmitter signal has been received.

3.To accept, press the \\"CLR\\" button on the radio / control panel / receiver or wait until the LED goesFor further buttons on this or other remote controllers / transmitters, proceed as per section 1-2-2 WARNING! - To edit the remote control / transmitter button configuration by deleting the channel assignment to the button, remove the remote control / transmitter from memory (point III), and then re-enter the buttons in the desired manner. Attempting to enter 16 remote control / transmitter will fail.

Synchronising the remote control directly on the receiver

It is possible to enter pilots / transmitters without having to access radio buttons / control panel / receiver. To do this, you must have a transmitter already in place, with the button configuration you want to get in the next (new) pilots / transmitters:

1.Press and hold any pre / programmed remote control / transmitter button for 20 seconds.

2.Within 20 seconds press any button on the transmitter / transmitter to be entered / programmed. In order to enter more transmitters, follow the instructions. point. 1 and 2

WARNING! - The procedure for simple entering pilots / transmitters adds a new remote control / transmitter and sets its buttons according to the pre-programmed transmitter / transmitter configuration used in this procedure.

For the simple procedure of entering the transmitter successfully, the distance between the transmitter / transmitter and the receiver / control panel should not exceed 20 meters.

Mando FAAC® T27

Borrar mando
  • F 27,095
  • C FIX CODE
  • B 1,2,3
  • AP NO
  • M-Q MAX 1
FAAC® T27

La selección de mandos no se puede copiar en un único mando JMA