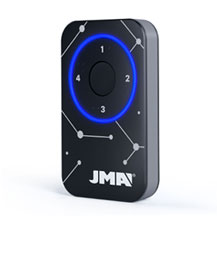
Maiztasuna
Kode mota
- Finkoa. Aginteak kode berbera igortzen du beti. Ez dago inongo enkriptatzerik eta behin kopiako agintea bikoiztu denean zuzenean funtzionatzen du hargailuan.
- Rolling. Aginteak kode desberdina igortzen du pultsazio bakoitzarekin. Agintearen kopia egin behar da, horrela marka eta modelo berbera baina serie-zenbaki desberdina duen aginte bat sortuz, hargailuan alta eman beharko dena. Hargailu bakoitzean kopia alta emateko jarraibide zehatzak daude, bai urrutitik alta emateko zein zuzenean, hargailua manipulatuz:
Botoiak
Autoprogramagarria. Agintea hargailuan altan eman daiteke aginte originala behar izanik gabe, betiere irrati-bidea gai bada eta memoria ez badago beteta.
PROZESUA:
- Hargailuaren aurrean zaudela, mantendu JMA agintea 10 segundoz sakatuta led gorria itzali (4 segundoren ondoren) eta berriz berde jarri arte (10 segundoren ondoren).
- Behin led-argia berdea jarri denean, askatu botoia eta itxaron behin betiko itzali arte. Prozesuak irauten duen bitartean, led berdea behin baino gehiagotan piztu eta itzaliko da, kode motaren arabera, behin betiko itzali arte.
Prozesuak funtzionatzen ez badu, probatu metodo estandarrarekin, aginte originala erabiliz edota zuzenean hargailuan sartuta.
Copy
No copy
CHAMBERLAIN 2.0® 892MAX agintea
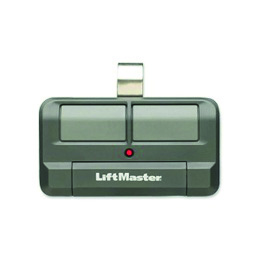
LIFT MASTER AGINTE EBOLUTIBOEI ALTA NOLA EMAN
Lift Master aginteari zuzenean bakarrik eman ahal zaio alta hargailuan.
Hargailuan alta zuzenean emateko prozedura
1. Urrutiko agintearen botoia sakatu eta ez askatu
2. Hargailuan, A kanalarentzako programatze-botoia (Learn) sakatu eta askatu.
3. Kontroleko LED argiak keinu bakar bat egingo du.
4. Urrutiko agintearen botoia askatu.
Urrutiko agintearen botoia kontroleko LED argia keinuka hasi baino lehen askatzen baduzu, hargailuak ez du kodea onartuko.
Urratsak errepikatu gainerako aginteekin.
Bigarren ate bat erabiltzen bada, urrutiko agintearen beste botoi bat hautatu eta B kanalarentzat azaldu diren urratsak errepikatu.
MERLIN® 2.0 E945M agintea
SPACE ® SP agintea
You must enter each transmitter button separately. Depending on whether the transmitter / pilot button is to control channel 1 or 2, use the corresponding button on the radio card / control panel / receiver to enter the programming procedure:
1.Press and hold the \\"1\\" button on the radio card / control panel / receiver for 2 seconds (if theprogrammed transmitter / transmitter button is to operate channel 1) or the \\"2\\" button (if the programmable pilot / transmitter button is to operate channel 2). The LED will flash.
2.Within 20 seconds press the button of the transmitter / transmitter to be entered - the LED briefly illuminates with a continuous tone, indicating that the correct pilot / transmitter signal has been received.
3.To accept, press the \\"CLR\\" button on the radio / control panel / receiver or wait until the LED goesFor further buttons on this or other remote controllers / transmitters, proceed as per section 1-2-2 WARNING! - To edit the remote control / transmitter button configuration by deleting the channel assignment to the button, remove the remote control / transmitter from memory (point III), and then re-enter the buttons in the desired manner. Attempting to enter 16 remote control / transmitter will fail.
Synchronising the remote control directly on the receiver
It is possible to enter pilots / transmitters without having to access radio buttons / control panel / receiver. To do this, you must have a transmitter already in place, with the button configuration you want to get in the next (new) pilots / transmitters:
1.Press and hold any pre / programmed remote control / transmitter button for 20 seconds.
2.Within 20 seconds press any button on the transmitter / transmitter to be entered / programmed. In order to enter more transmitters, follow the instructions. point. 1 and 2
WARNING! - The procedure for simple entering pilots / transmitters adds a new remote control / transmitter and sets its buttons according to the pre-programmed transmitter / transmitter configuration used in this procedure.
For the simple procedure of entering the transmitter successfully, the distance between the transmitter / transmitter and the receiver / control panel should not exceed 20 meters.
NORMSTAHL® EA4333-KM agintea
- F 433,92
- C ROLLING CODE
- B 2
- AP NO
- M-BT Biometric / BT Slim / M-FR1 / M-NOVA PRO / M-BT Advance

CRAWFORD/NORMSTHAL AGINTE EBOLUTIBOEI ALTA NOLA EMAN
CRAWFORD/NORMSTHAL agintearen alta zuzenean bakarrik memorizatu daiteke. Hauxe da prozedura:
Hargailuan alta emateko prozedura
1. \"SET\" sakagailua sakatu:
Behin sakatu bulkadarako (Hargailua aktibo dago agintea sakatzen den bitartean)
2 aldiz erantzun biegonkorrarentzat (Hargailua aktibo dago berriro sakatu arte)
3 aldiz \"ON\" moduarentzat
4 aldiz \"OFF\" moduarentzat
2. Sakatu alta emateko igorlearen botoia
3. LED argia keinuka hasiko da kodea memorizatu duela adierazteko.
NOVOFERM® MNHS agintea
- F 433,92
- C ROLLING CODE
- B 2,4
- AP NO
- M-BT Biometric / BT Slim / M-FR1 / M-NOVA PRO / M-BT Advance
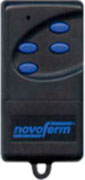
NOVOFERM AGINTE EBOLUTIBOEI ALTA NOLA EMAN
Novoferm aginteari zuzenean bakarrik eman ahal zaio alta hargailuan.
Hargailuan alta zuzenean emateko prozedura
1. Ireki hargailua eta sakatu hargailuko sakagailua LED argia keinuka hasten den arte.
2. Ondoren, igorlearen sakagailua 3 segundoz sakatuta eduki hargailuko LED argia keinuka hasi arte.
Sabaiko motorren kasuan, ondorengo jarraibideei jarraitu.