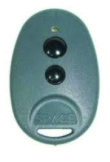
Copiez votre télécommande
Rechercher le modèle de la télécommande originale à reproduire à nos télécommandes JMA
Fréquence
Type de code
- Fixe. Le code émis par la commande est toujours le même. Il n’existe aucun cryptage et après la copie, la commande copie fonctionne directement avec le récepteur.
- Rolling. Le code émis par la commande change avec chaque pulsation. Il faut effectuer la copie de la commande en créant ainsi une commande de la même marque et du même modèle, mais avec un numéro de série différent qui devra être enregistré dans le récepteur. Il existe des instructions concrètes pour chaque récepteur pour savoir comment enregistrer la copie, que ce soit à distance ou directement en manipulant le récepteur.
Boutons
Auto-Programmable. La commande peut être enregistrée dans le récepteur sans besoin de la commande originale, à condition que le ‘via radio’ soit activé et que la mémoire ne soit pas pleine.
SÉQUENCE :
- Devant le récepteur, il faut appuyer pendant 10 secondes sur la commande JMA jusqu’à ce que le témoin rouge s’éteigne (après 4 secondes) et revienne au vert (après 10 secondes).
- Une fois que le témoin est allumé en vert, il faut lâcher le bouton et attendre que le témoin s’éteigne définitivement. Pendant la séquence, le led vert s’allumera et s’éteindra une ou plusieurs fois en fonction du type de code, puis il s’éteindra définitivement.
Si la séquence ne fonctionne pas, essayez le mode standard en utilisant la commande originale ou en accédant directement au récepteur.
Copy
No copy
FOR: SPACE® SP
- F 433,92MHz
- C ROLLING CODE
- B 2,4
- AP YES
- M-NOVA PRO / BT Slim / M-BT Biometric / M-BT Advance

You must enter each transmitter button separately. Depending on whether the transmitter / pilot button is to control channel 1 or 2, use the corresponding button on the radio card / control panel / receiver to enter the programming procedure:
1.Press and hold the \"1\" button on the radio card / control panel / receiver for 2 seconds (if theprogrammed transmitter / transmitter button is to operate channel 1) or the \"2\" button (if the programmable pilot / transmitter button is to operate channel 2). The LED will flash.
2.Within 20 seconds press the button of the transmitter / transmitter to be entered - the LED briefly illuminates with a continuous tone, indicating that the correct pilot / transmitter signal has been received.
3.To accept, press the \"CLR\" button on the radio / control panel / receiver or wait until the LED goesFor further buttons on this or other remote controllers / transmitters, proceed as per section 1-2-2 WARNING! - To edit the remote control / transmitter button configuration by deleting the channel assignment to the button, remove the remote control / transmitter from memory (point III), and then re-enter the buttons in the desired manner. Attempting to enter 16 remote control / transmitter will fail.
Synchronising the remote control directly on the receiver
It is possible to enter pilots / transmitters without having to access radio buttons / control panel / receiver. To do this, you must have a transmitter already in place, with the button configuration you want to get in the next (new) pilots / transmitters:
1.Press and hold any pre / programmed remote control / transmitter button for 20 seconds.
2.Within 20 seconds press any button on the transmitter / transmitter to be entered / programmed. In order to enter more transmitters, follow the instructions. point. 1 and 2
WARNING! - The procedure for simple entering pilots / transmitters adds a new remote control / transmitter and sets its buttons according to the pre-programmed transmitter / transmitter configuration used in this procedure.
For the simple procedure of entering the transmitter successfully, the distance between the transmitter / transmitter and the receiver / control panel should not exceed 20 meters.
