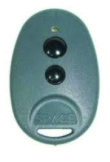
Copie o seu comando
Pesquise o modelo do comando original para copiar os nossos comandos JMA
Frequência
Tipo de código
- Fixo. O código emitido pelo comando é sempre o mesmo. Não existe qualquer encriptação e, após duplicado, o comando cópia funciona diretamente no recetor.
- Rolling. O código emitido pelo comando muda com cada toque. Deve ser realizada a cópia do comando, gerando assim um comando da mesma marca e modelo mas com um número de série diferente, que será necessário registar no recetor. Existem instruções concretas para cada recetor relativas a como registar a cópia, quer seja à distância ou diretamente no recetor.
Botões
Auto-programável. O comando pode ser registado no recetor sem necessidade do comando original, sempre que a via rádio esteja habilitada e a memória não esteja cheia.
PROCESSO:
- Diante do recetor, manter premido o comando JMA durante 10 segundos até que o LED vermelho se apague (aos 4 segundos) e passa novamente para verde (aos 10 segundos).
- Quando o LED acender a verde, libertar o botão e esperar a que o LED se apagar definitivamente. Durante o processo, o LED verde acenderá e apagará um ou várias vezes segundo o tipo de código até apagar-se definitivamente.
Se o processo não funcionar, provar o método padrão utilizando o comando original ou acedendo diretamente ao recetor
Copy
No copy
FOR: SPACE® SP
- F 433,92MHz
- C ROLLING CODE
- B 2,4
- AP YES
- M-NOVA PRO / BT Slim / M-BT Biometric / M-BT Advance

You must enter each transmitter button separately. Depending on whether the transmitter / pilot button is to control channel 1 or 2, use the corresponding button on the radio card / control panel / receiver to enter the programming procedure:
1.Press and hold the \"1\" button on the radio card / control panel / receiver for 2 seconds (if theprogrammed transmitter / transmitter button is to operate channel 1) or the \"2\" button (if the programmable pilot / transmitter button is to operate channel 2). The LED will flash.
2.Within 20 seconds press the button of the transmitter / transmitter to be entered - the LED briefly illuminates with a continuous tone, indicating that the correct pilot / transmitter signal has been received.
3.To accept, press the \"CLR\" button on the radio / control panel / receiver or wait until the LED goesFor further buttons on this or other remote controllers / transmitters, proceed as per section 1-2-2 WARNING! - To edit the remote control / transmitter button configuration by deleting the channel assignment to the button, remove the remote control / transmitter from memory (point III), and then re-enter the buttons in the desired manner. Attempting to enter 16 remote control / transmitter will fail.
Synchronising the remote control directly on the receiver
It is possible to enter pilots / transmitters without having to access radio buttons / control panel / receiver. To do this, you must have a transmitter already in place, with the button configuration you want to get in the next (new) pilots / transmitters:
1.Press and hold any pre / programmed remote control / transmitter button for 20 seconds.
2.Within 20 seconds press any button on the transmitter / transmitter to be entered / programmed. In order to enter more transmitters, follow the instructions. point. 1 and 2
WARNING! - The procedure for simple entering pilots / transmitters adds a new remote control / transmitter and sets its buttons according to the pre-programmed transmitter / transmitter configuration used in this procedure.
For the simple procedure of entering the transmitter successfully, the distance between the transmitter / transmitter and the receiver / control panel should not exceed 20 meters.
