
Frequency
Type of code
- Fixed. The code emitted by the remote control, is always the same. There is no encryption and once the remote control is duplicated, the copy works directly in the receiver.
- Rolling. The code emitted by the remote control, changes with each pulse. A copy of the remote control should be made, that way generating the same brand and model but with a different serial number, that will be necessary for registry in the receiver. There are specific instructions for each receiver of either how to register the copy, remotely or directly manipulating the receiver.
Buttons
Auto-Programmable The remote control can be registered in the receiver without the need of the original remote control, as long as radio communication is activated and the memory is not full.
PROCESS:
- In front of the receiver keep the JMA remote control pressed during 10 seconds until the red LED goes off (after 4 seconds) and it turns to green (at 10 seconds).
- Once the LED is green, release the button and wait for the LED to definitely go off. During the process, the green LED will flash once or several times depending on the code type until finally going off.
If the process does not work, test the standard method using the original remote control or gaining access directly from the receiver.
Copy
No copy
CHAMBERLAIN® 75EML Remote
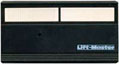
BALLAN® BFM 404 Remote
- F 433,92
- C ROLLING CODE
- B 4
- AP YES
- M-BT Biometric / BT Slim / M-FR1 / M-NOVA PRO / M-BT Advance
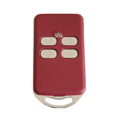
SYNCHRONISING TELCOMA FM ROLLING CODE REMOTE CONTROLS
TELCOMA FM remote controls can be synchronised either directly on the receiver or remotely using a remote control already synchronised with the receiver.
Remote synchronisation procedure
This procedure requires at least one four-channel remote control with the previous system already synchronised with the receiver.
1. Press the 4 buttons on the remote control already synchronised with the receiver simultaneously for 3 seconds.
2. Release, and within 2 seconds briefly press, on the same original device, the button that the receiver has already synchronised.
3. Within 2 seconds press the button of the remote control you wish to synchronise.
4. Repeat the process for the remaining buttons if necessary.
Direct synchronisation procedure on the receiver
1. On the receiver, press the P button associated with the channel to be synchronised with the remote control.
2. The LED will flash 5 times.
3. While the LED is flashing press the button on the remote control associated with the code to be synchronised.
4. If synchronisation is successful, the LED will emit a long flash.
5. Repeat the operation for all other remote controls you wish to synchronise.
DICKERT® FHS20-K Remote
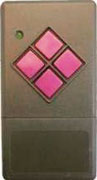
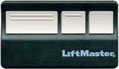
LIFT MASTER® 84335E/EML Remote
- F 433,92
- C ROLLING CODE
- B 3
- AP NO
- M-BT Biometric / BT Slim / M-FR1 / M-NOVA PRO / M-BT Advance
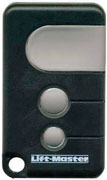
SYNCHRONISING LIFT MASTER ROLLING CODE REMOTE CONTROLS
The Lift Master remote control can only be synchronised directly on the receiver.
Direct synchronisation procedure on the receiver
1. Press the button on the remote control and hold.
2. Press and release the Learn button for channel A on the receiver.
3. The control LED will flash once.
4. Release the remote control button.
If you release the remote control button before the control LED flashes the receiver will not accept the code.
Repeat this procedure for any other devices you wish to add.
If you are using a second door, select another button on the remote control and repeat the steps for channel B.
CHAMBERLAIN® 433EML Remote
- F 433,92
- C FIX CODE
- B 1,3
- AP NO
- M-BT Biometric / BT Slim / M-FR1 / LITE / M-NOVA PRO / M-BT Advance / SR-4V / SR-48
SOMMER® 4025 Remote
- F 868,3
- C ROLLING CODE
- B 2
- AP NO
- M-BT Biometric / BT Slim / M-FR1 / M-NOVA PRO / M-BT Advance
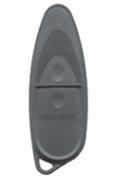
SYNCHRONISING SOMMER ROLLING CODE REMOTE CONTROLS
SOMMER remote control can only be synchronised directly on the receiver.
Direct synchronisation procedure on the receiver
1. Press button B on the receiver
a. Once for channel 1. LED (C1) will light up.
b. Twice for channel 2. LED (C2) will light up.
The receiver will exit synchronisation mode if no code is transmitted during a period of 10 seconds.
To exit synchronisation mode, press key B several times until all LEDs have turned off.
2. Press the desired button (D) on the remote control. The transmitter will send the radio code to the receiver.
The LED for the selected channel will flash and switch off.
Repeat Steps 1 and 2 to synchronise additional transmitters with this receiver.
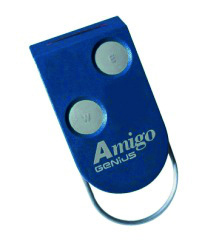
GENIUS® AMIGO Remote
- F 868,3
- C ROLLING CODE
- B 2,4
- AP YES
- M-BT Biometric / BT Slim / M-FR1 / M-NOVA PRO / M-BT Advance / SR-4V / SR-48
SYNCHRONISING FAAC ROLLING CODE REMOTE CONTROLS
FAAC remote controls can be synchronised using a master remote control with its own code. In this case it is not necessary to work directly or remotely with the receiver.
Follow these steps to synchronise a slave remote control from a master device. This procedure is valid for the TML and 868 SLH series.
TML series
Warning: if you press the slave remote control first and then the master device you will delete the master codes.
1. Press the button of the already synchronised remote control and hold down.
2. Still holding down the master device button, press the same button on the slave with the two devices close to each other.
The LED on the slave will flash.
3. Repeat the operation for the remaining buttons.
SERIE 868SLH
Warning: if you press the slave remote control first and then the master device you will delete the master codes.
1. Press the two buttons on the master device until the LED starts flashing and release after one second (on devices with four buttons, press the top right and lower left buttons).
2. Before the master device LED stops flashing, press the top right button on the master device again with the remote controls close to each other. The master LED will change to steady.
3. Still holding down the master device button, press the same button on the slave.
The slave device LED will flash once to confirm that the code has been stored.
4. Release both buttons.
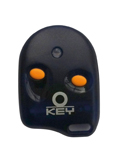
KEY® TXP-42 Remote
- F 433,92
- C FIX CODE
- B 2
- AP NO
- M-BT Biometric / BT Slim / M-FR1 / LITE / M-NOVA PRO / M-BT Advance / SR-4V / SR-48
FORSA® S27M Remote
The selected remotes can not be copied with a single JMA remote